
How to use Buffer to Schedule Social Media
I can't tell you how many times I would forget to post to Facebook or Instagram and then I would be away from my desk and unable to post something high quality.
I started scheduling my posts ahead of time and it made a huge difference in my daily routine. I was no longer glued to my phone or constantly worried if I had posted for the day.
I experimented with several different scheduling tools before eventually landing on Buffer. I love the interface and how user-friendly the site is. I recently upgraded to the awesome plan and have been happy with it so far.
If you’re looking for a way to relieve the stress of social media, let me tell you how Buffer can help.
1 | Decide which social media platforms you want to focus on
I typically suggest choosing 3 or 4 platforms to focus on. Many more than that and it can become difficult to manage. Consider your target audience and which platforms they use the most. If you’re not sure, ask them!
I focus my efforts on Facebook, Instagram, Pinterest and Twitter. In that order.


2 | Research the best times and how frequently to post for each platform
Deciding how often you plan to post to each platform is important. Certain platforms are more conducive to posting more frequently. There is a fine line between keeping your content in front of your audience and overwhelming them. Determine what will work for you and your audience, but keep in mind you can always make adjustments in the future.
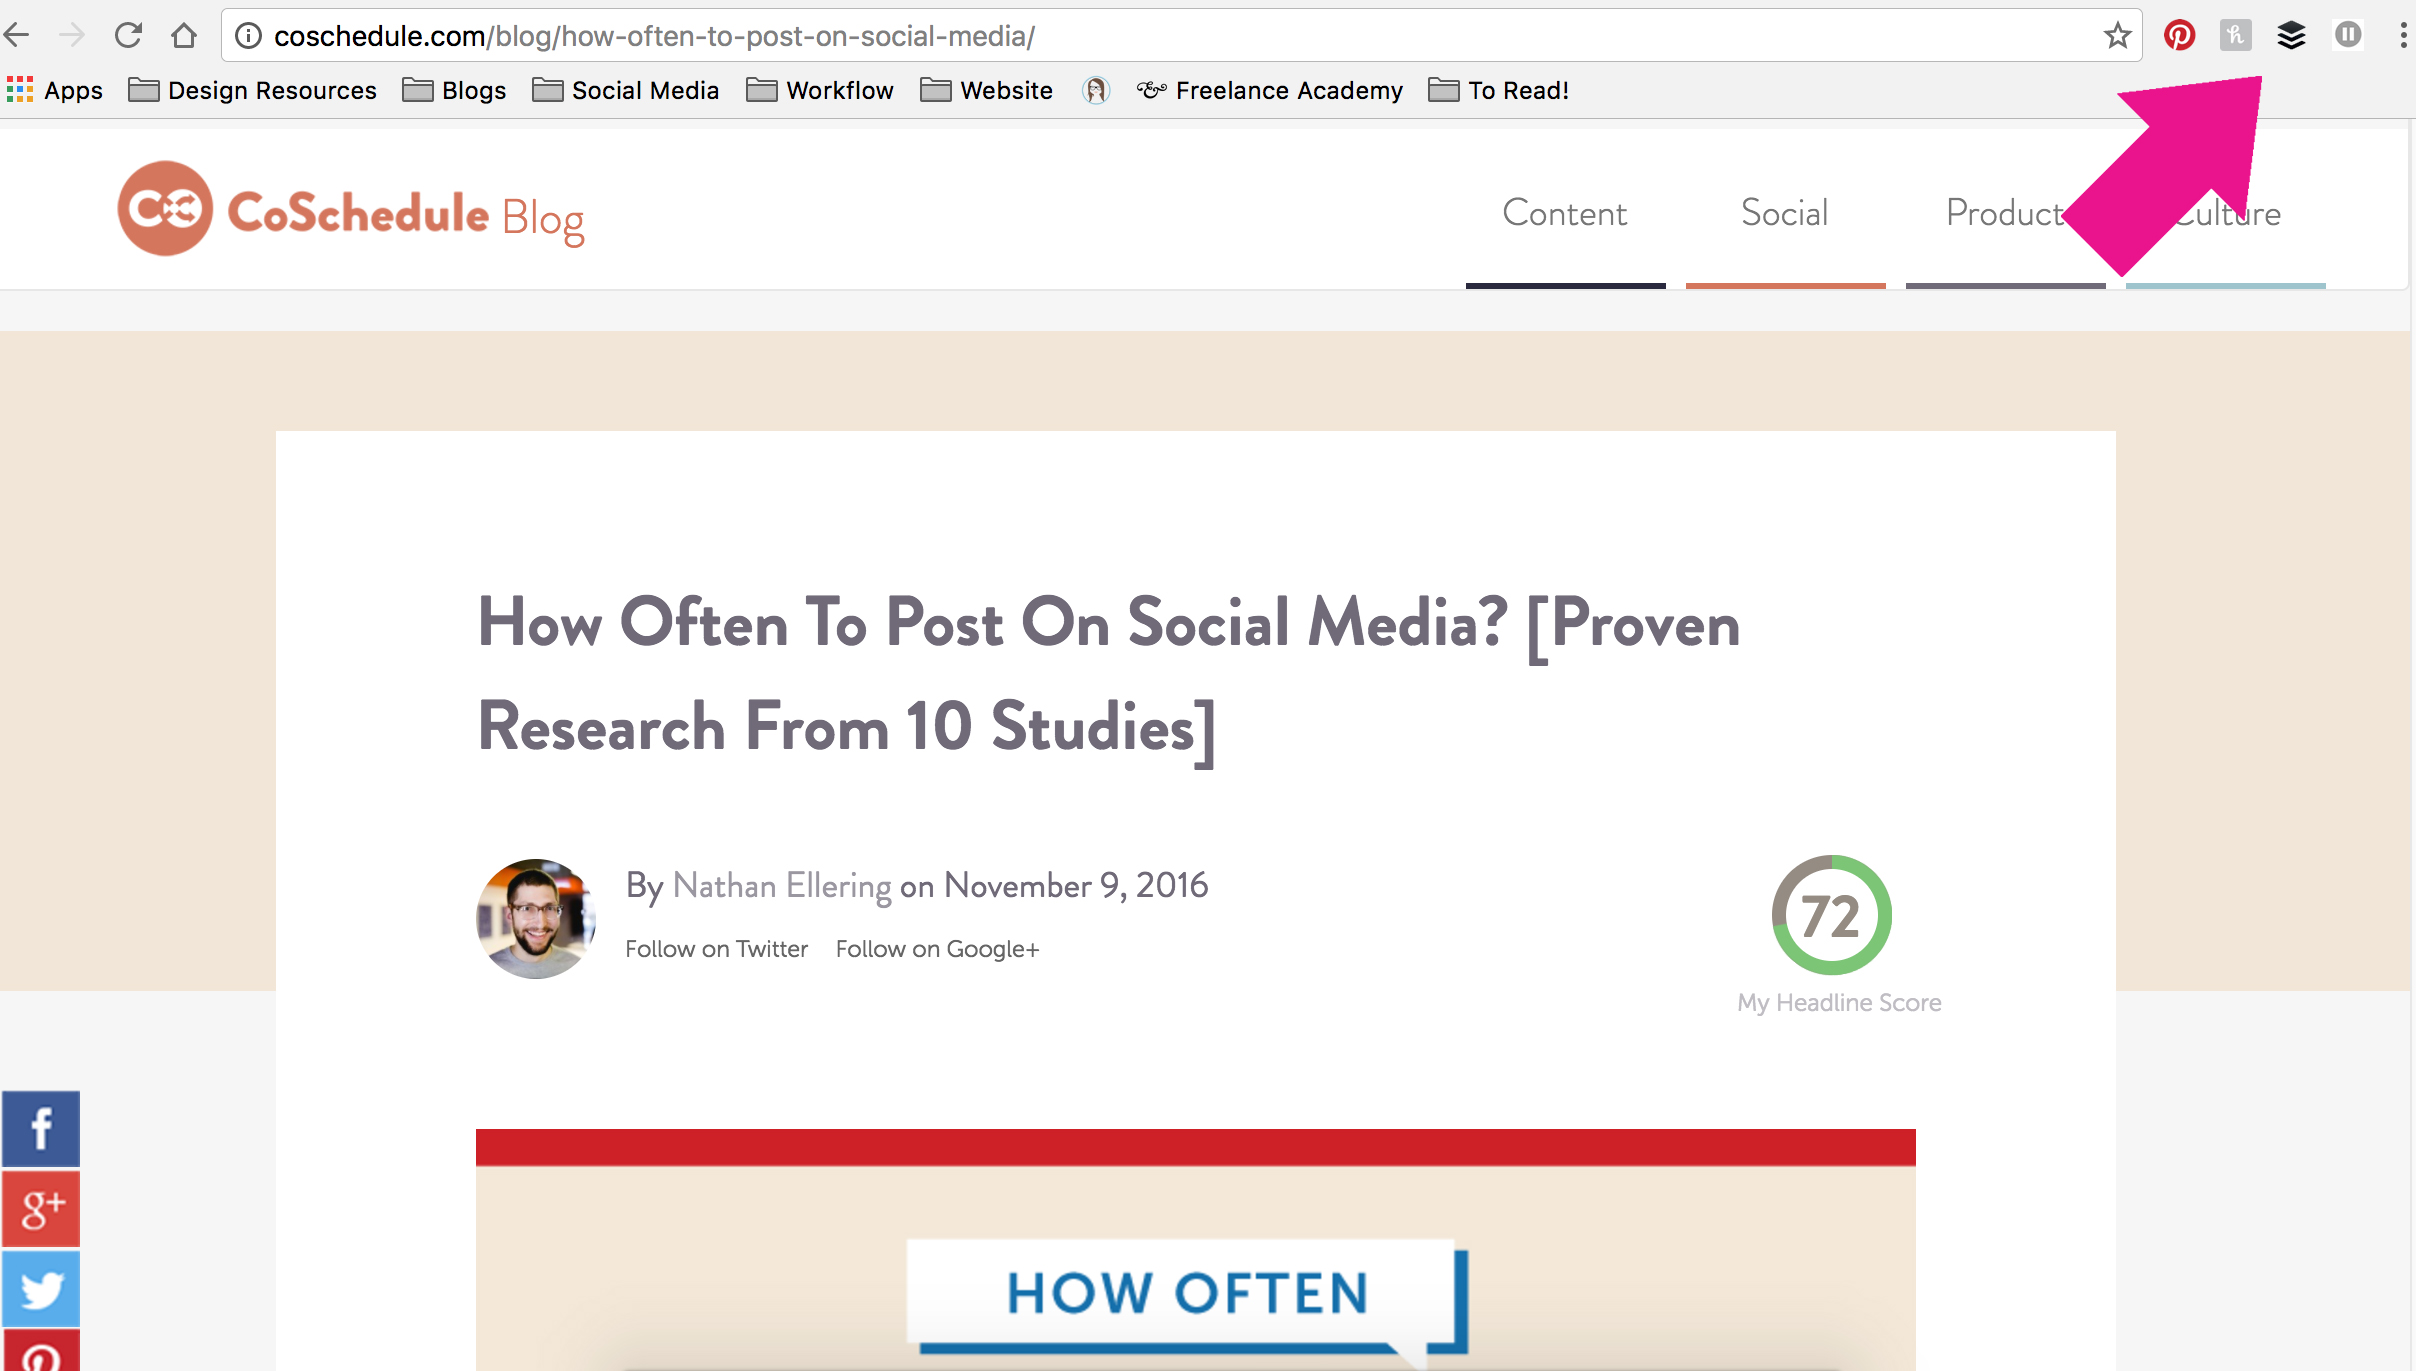
Check out this helpful article by CoSchedule on how often to post.
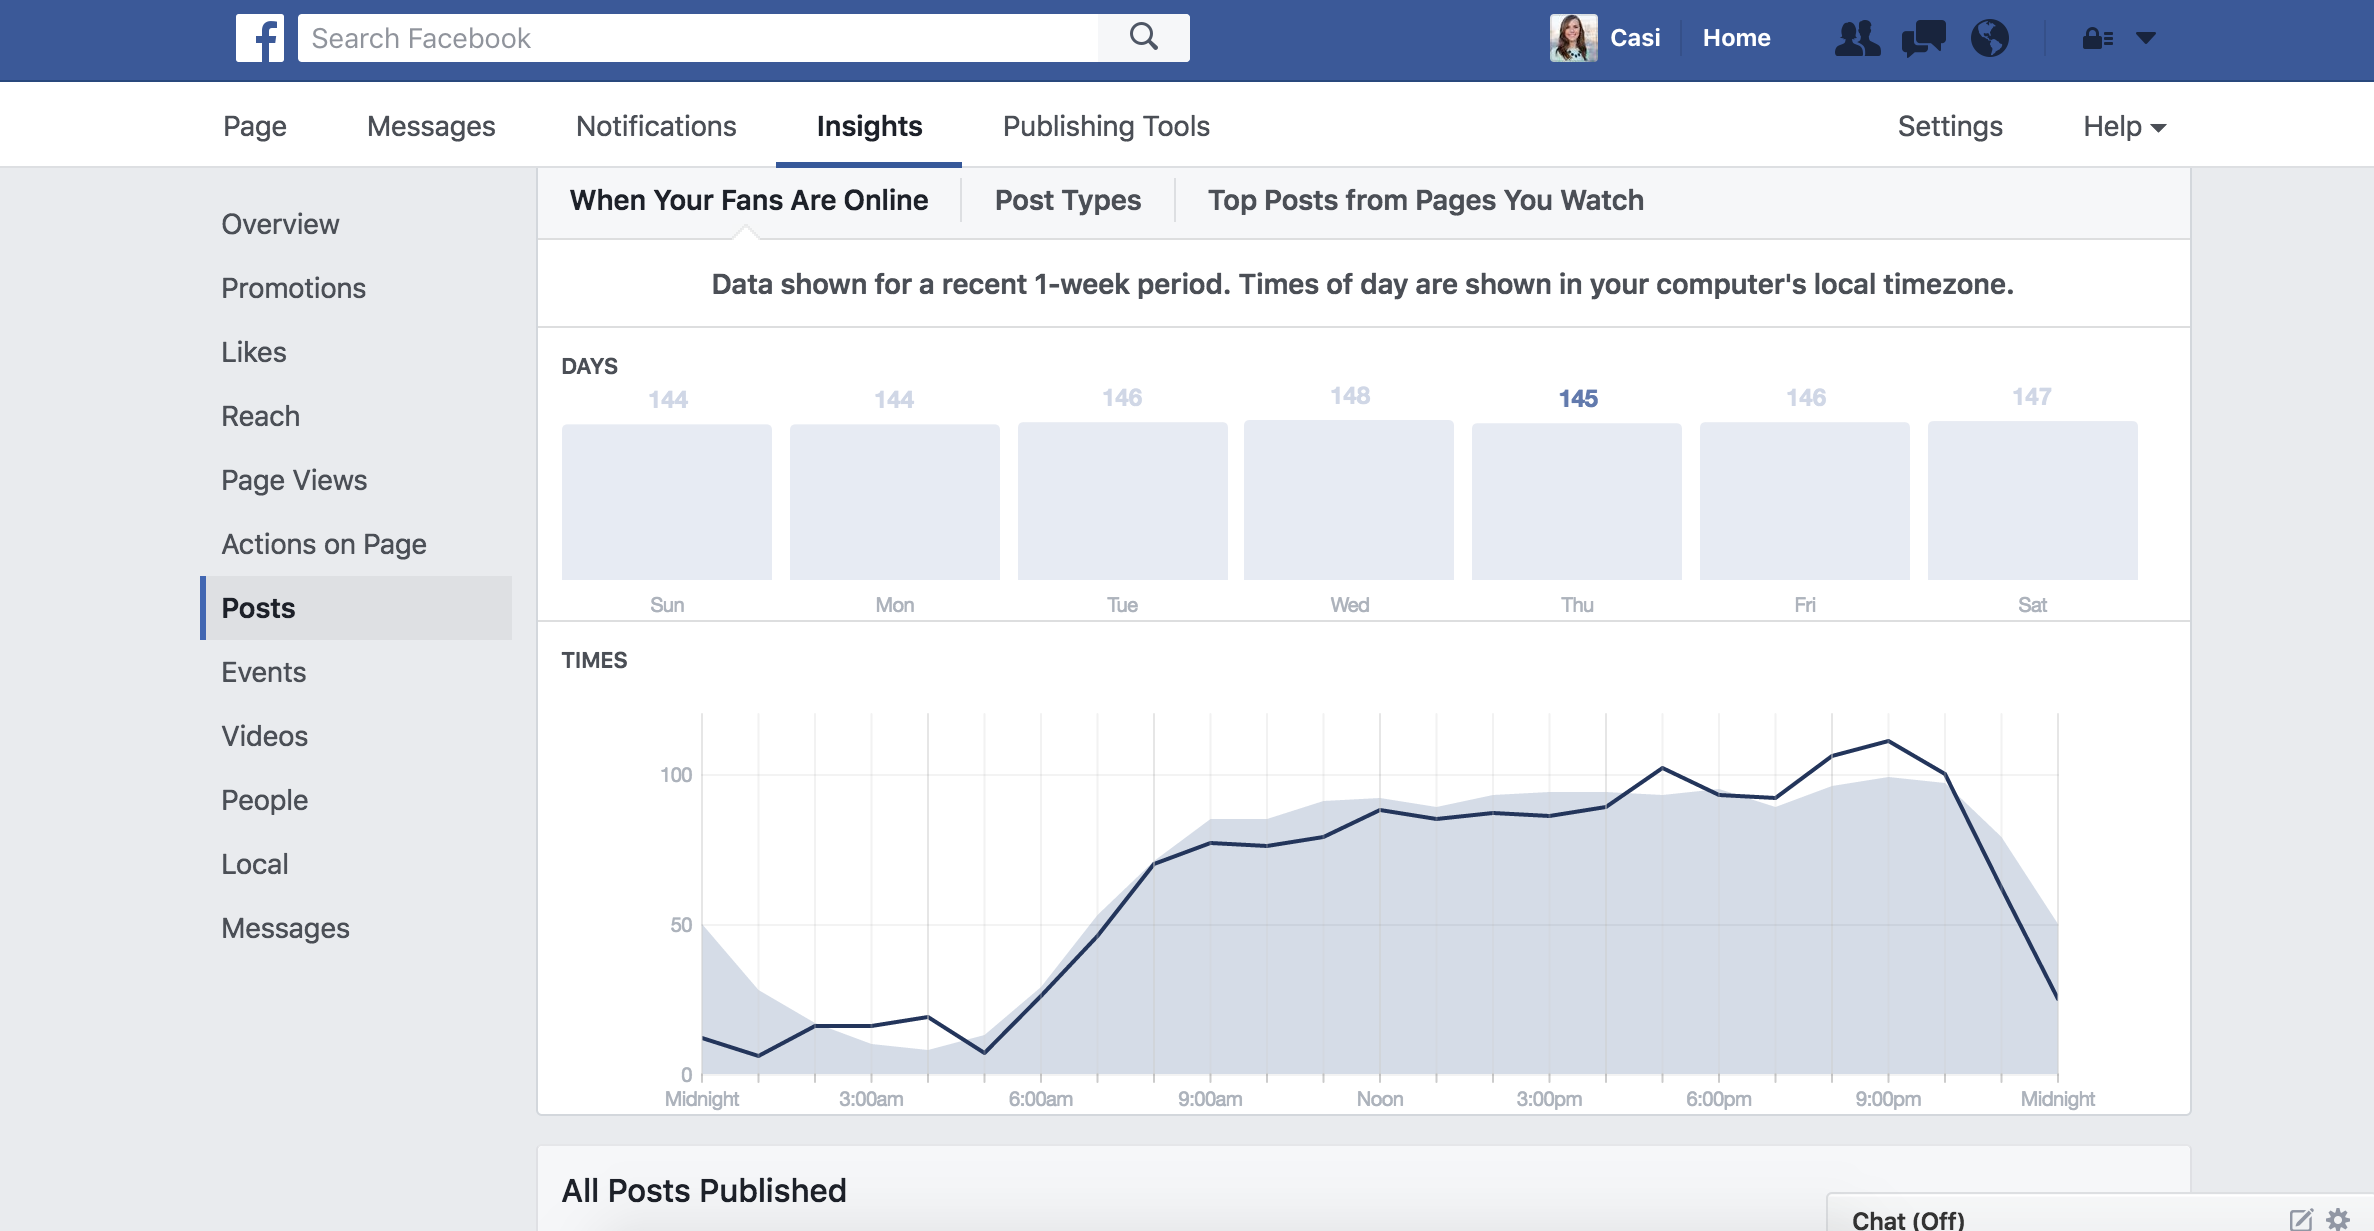
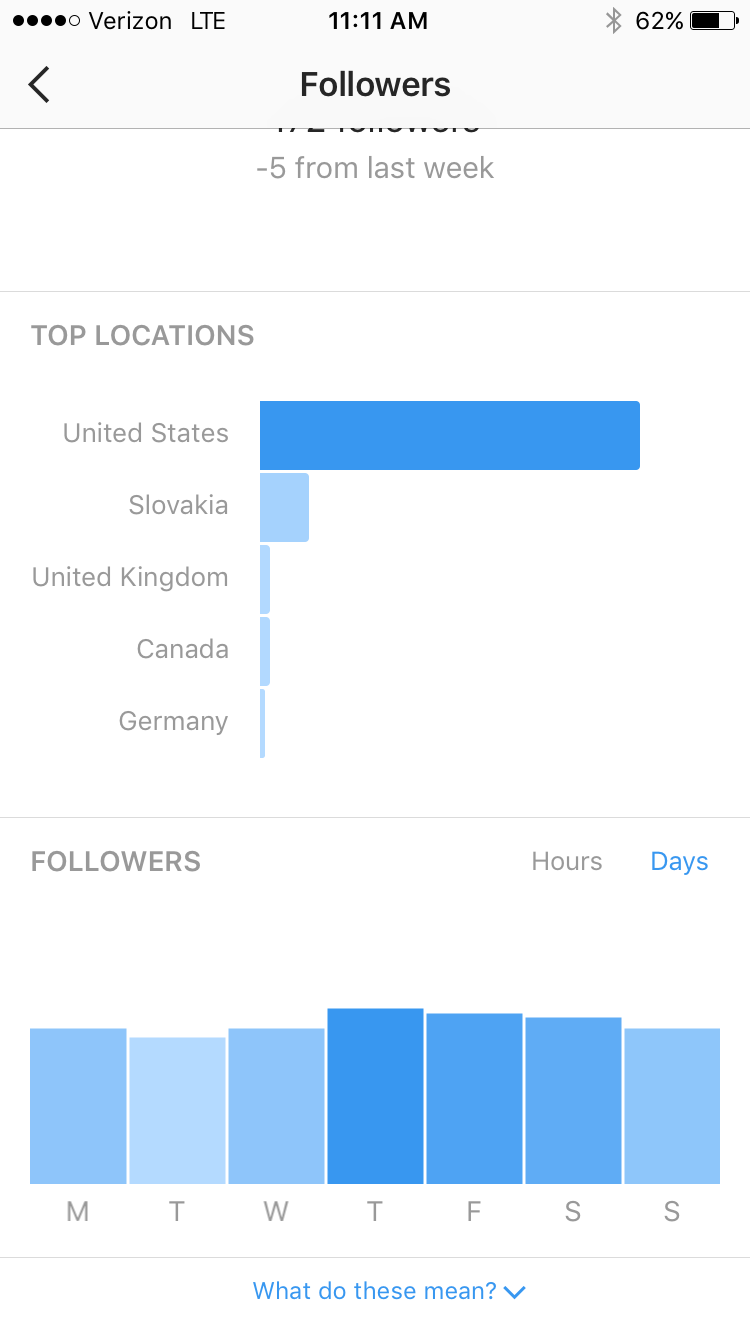
Spend some time researching what time of day to post. You can use websites like CoSchedule and SproutSocial to determine which times are most successful, but also take into account your specific audience. Use the analytics from your Facebook and Instagram profiles to find out when your followers are online.

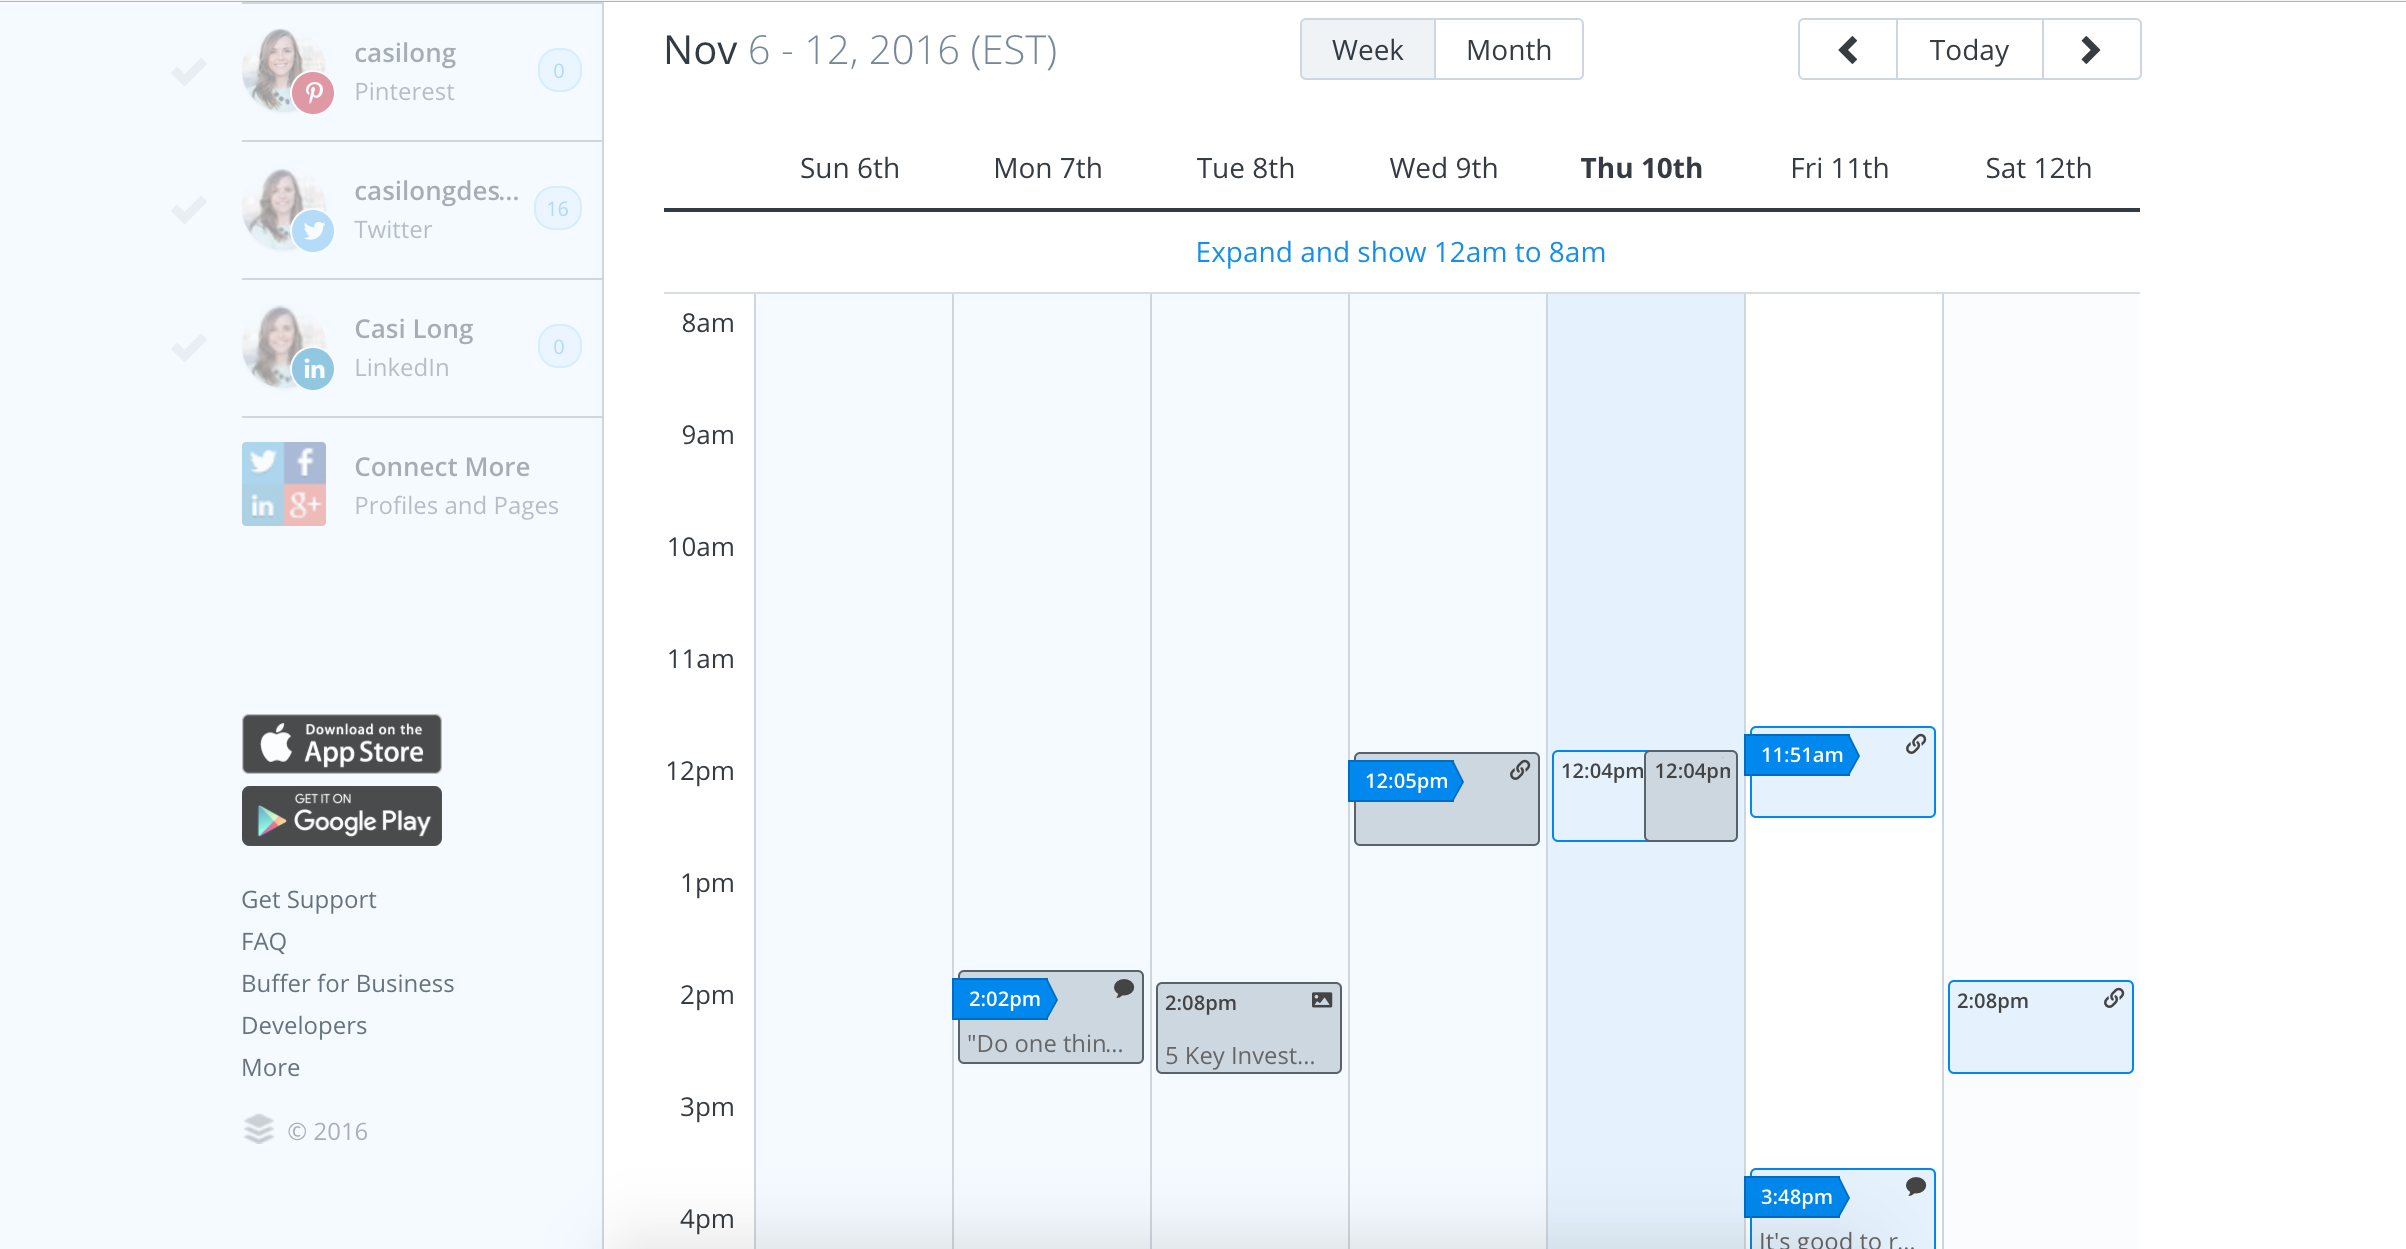
3 | Setup your posting schedule for each platform in Buffer
Use the content section of Buffer to setup your schedule. One of the main reasons I upgraded from the free version to the awesome plan was to set up different posting times for each day of the week.
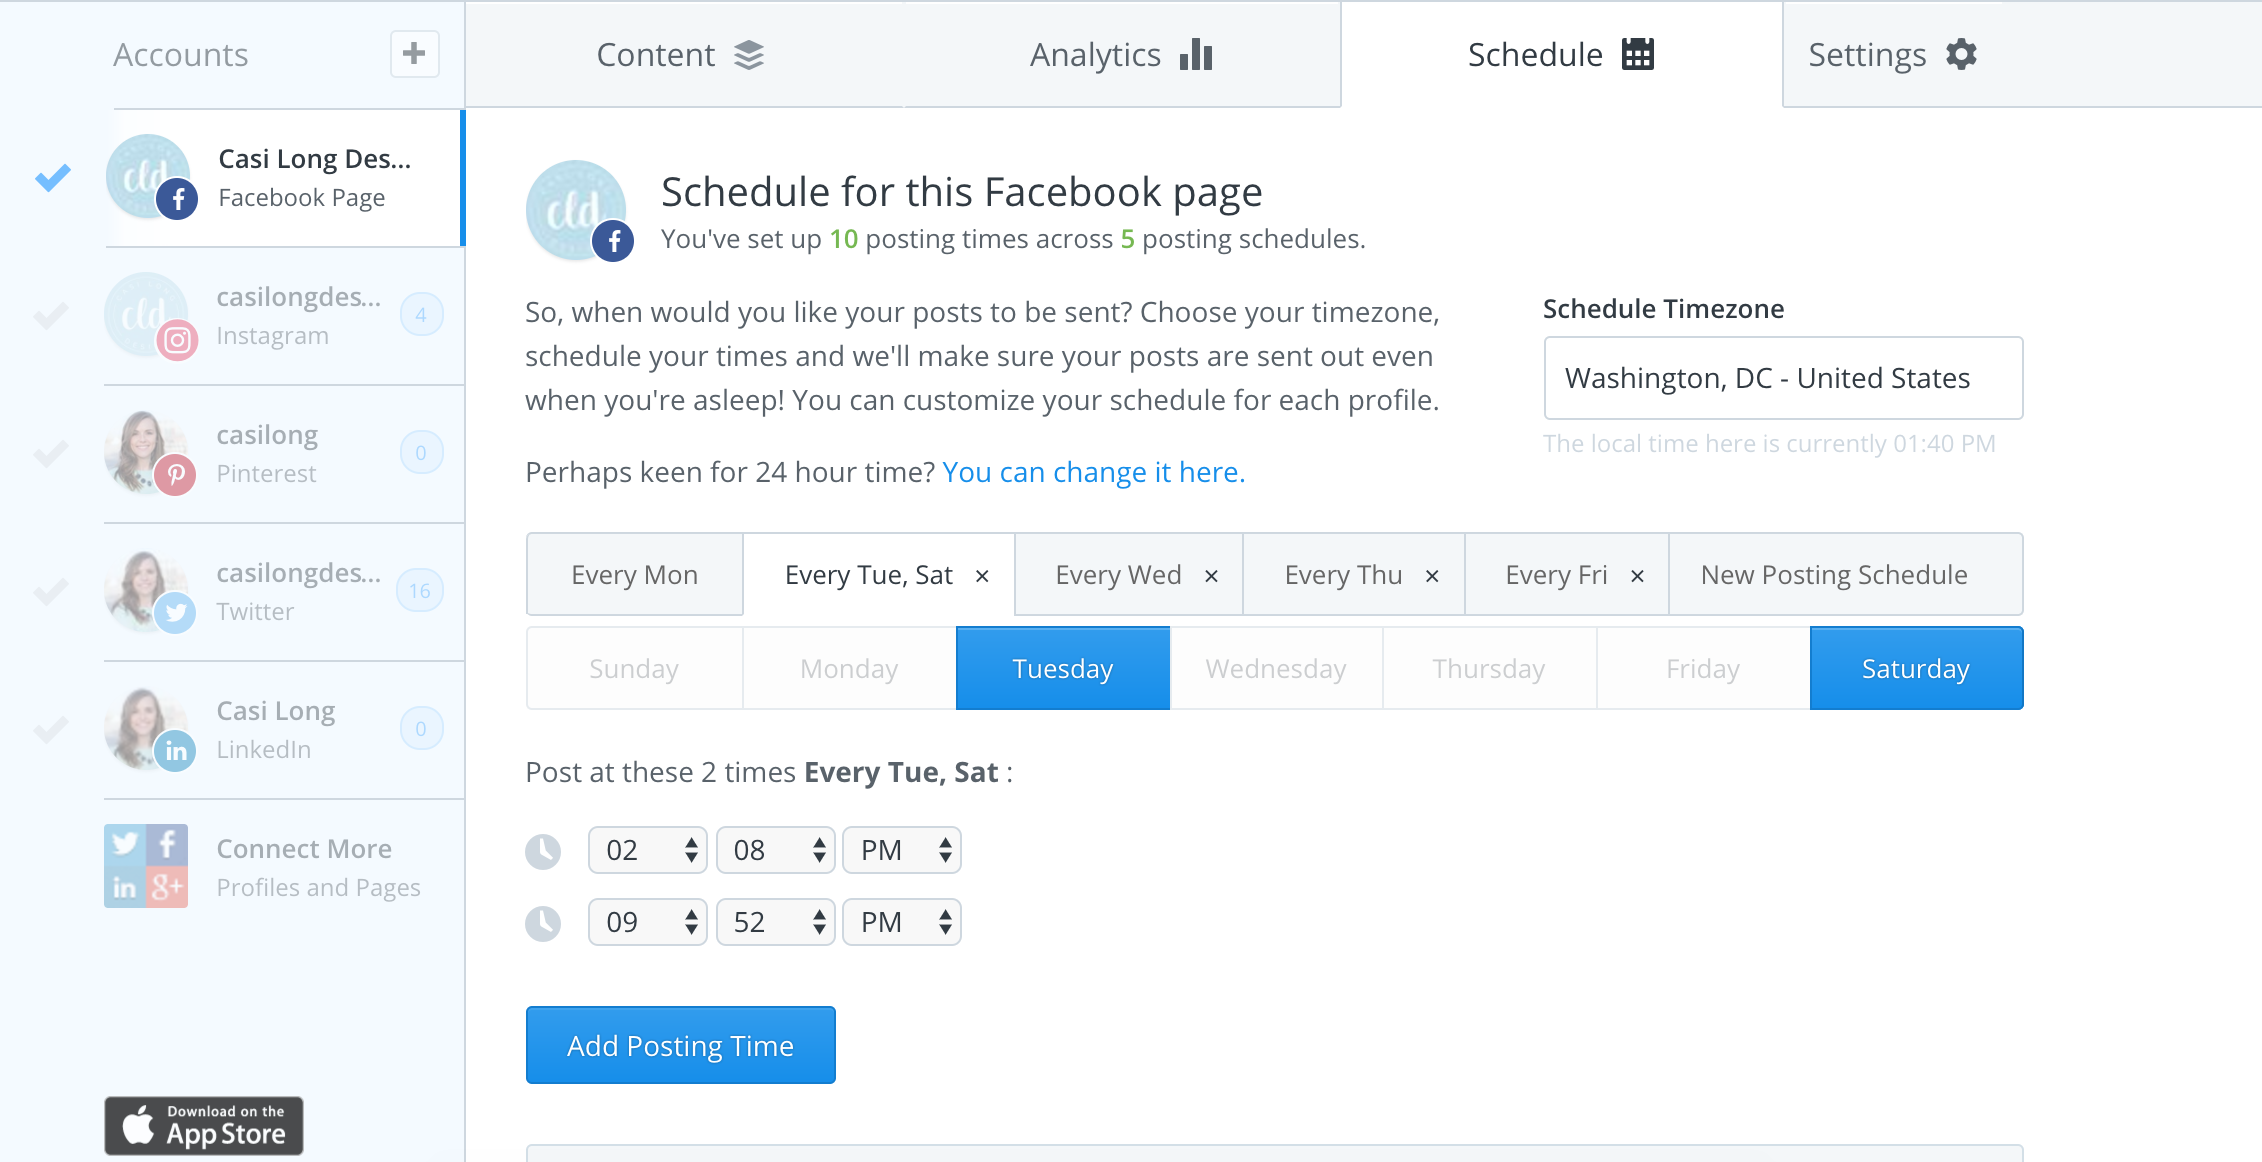
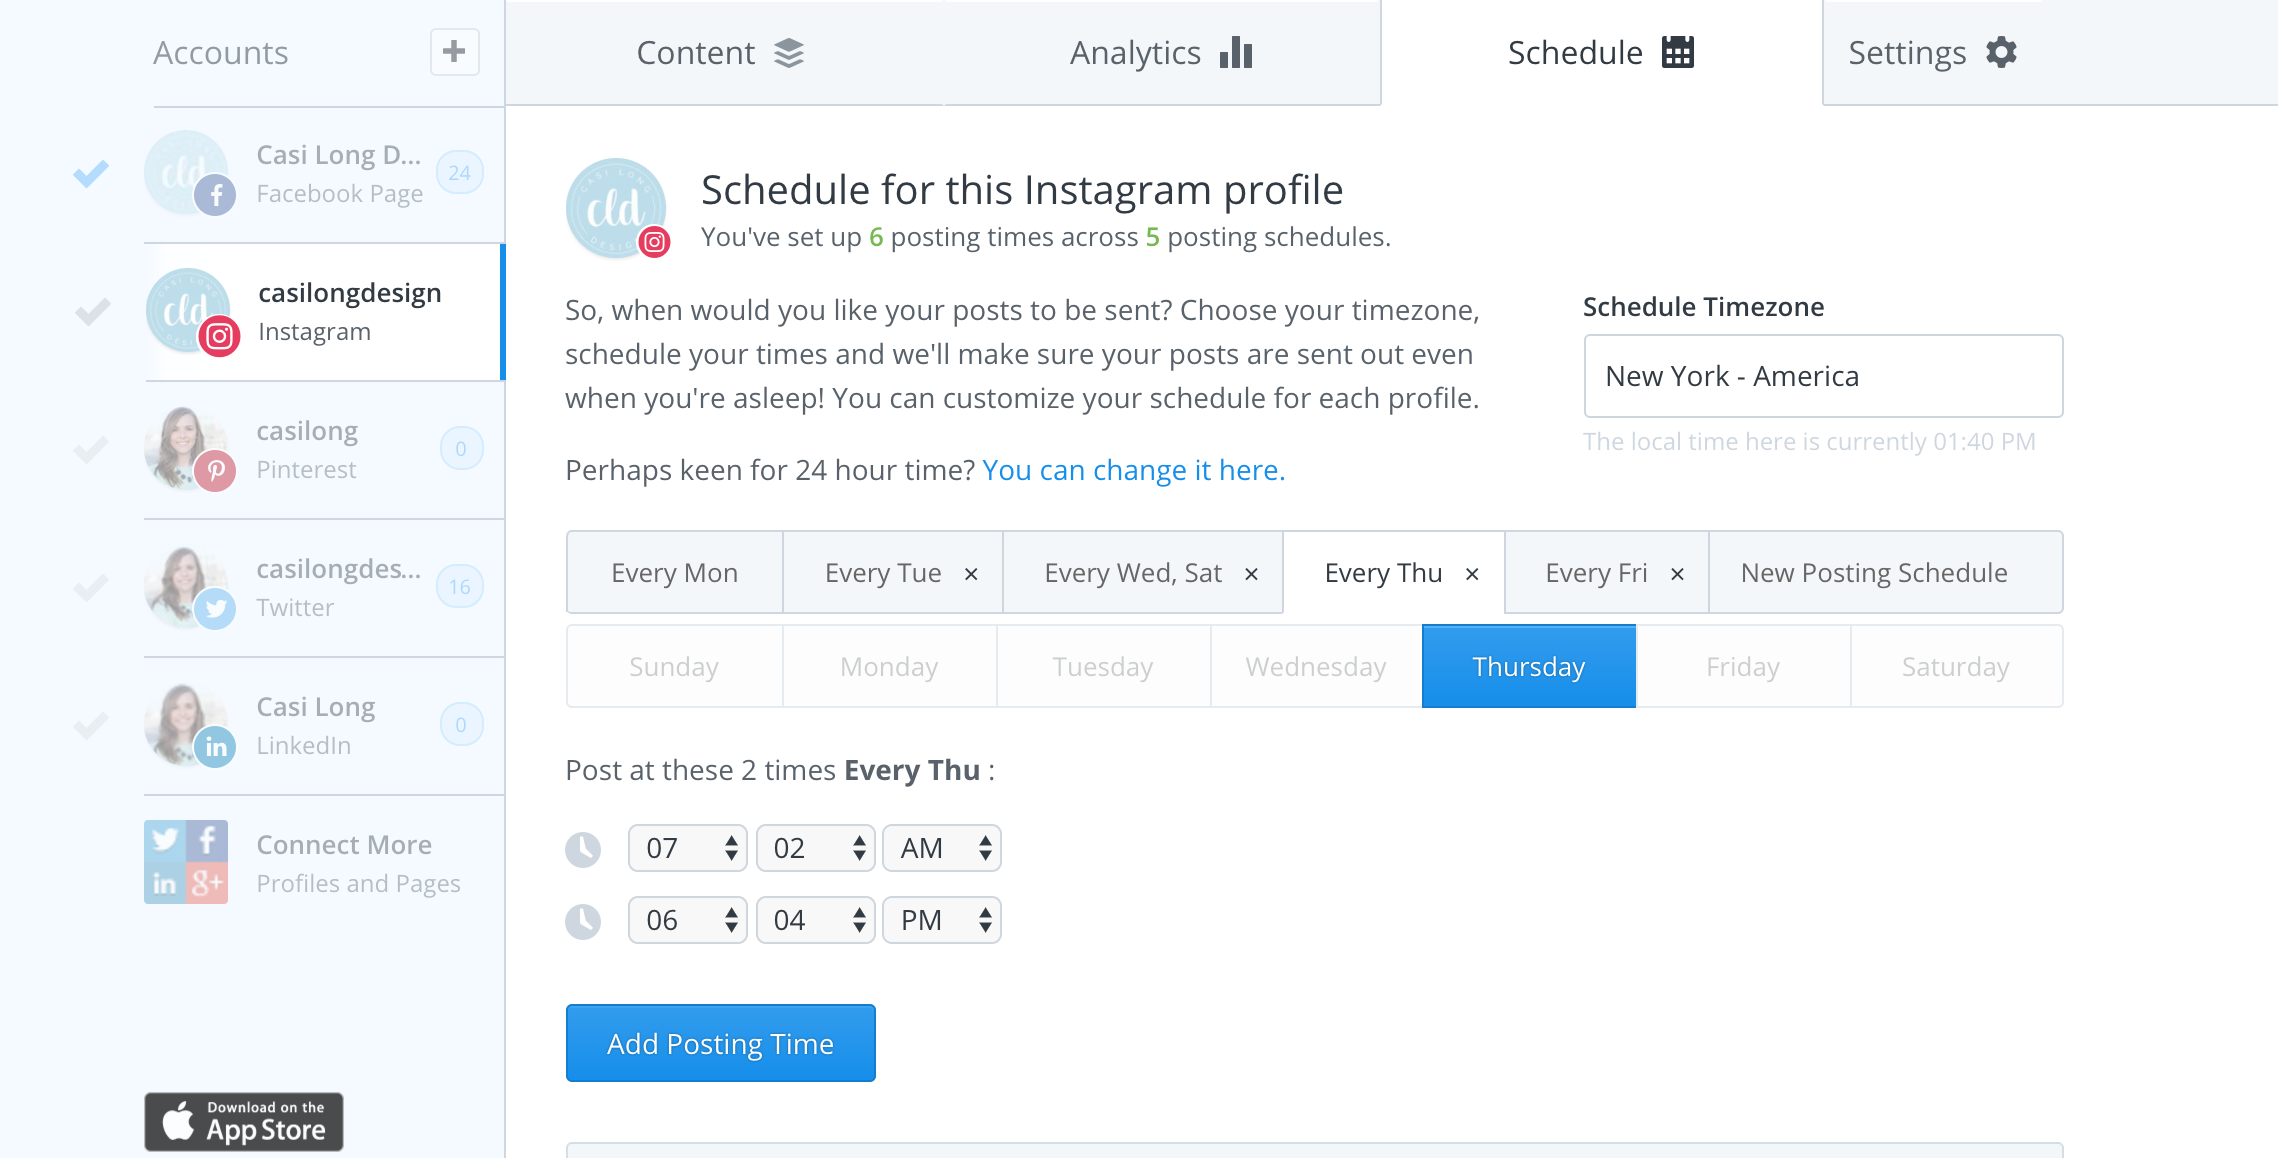
Spend the time to setup a schedule for each platform. I post twice daily to Facebook, once a day to Instagram and 3 times per day to Twitter. I have specific times per day I post, but they vary throughout the week. I spent an entire day at the outset setting up my schedule, but now it’s ready to go and I don’t have to worry about what time to post.
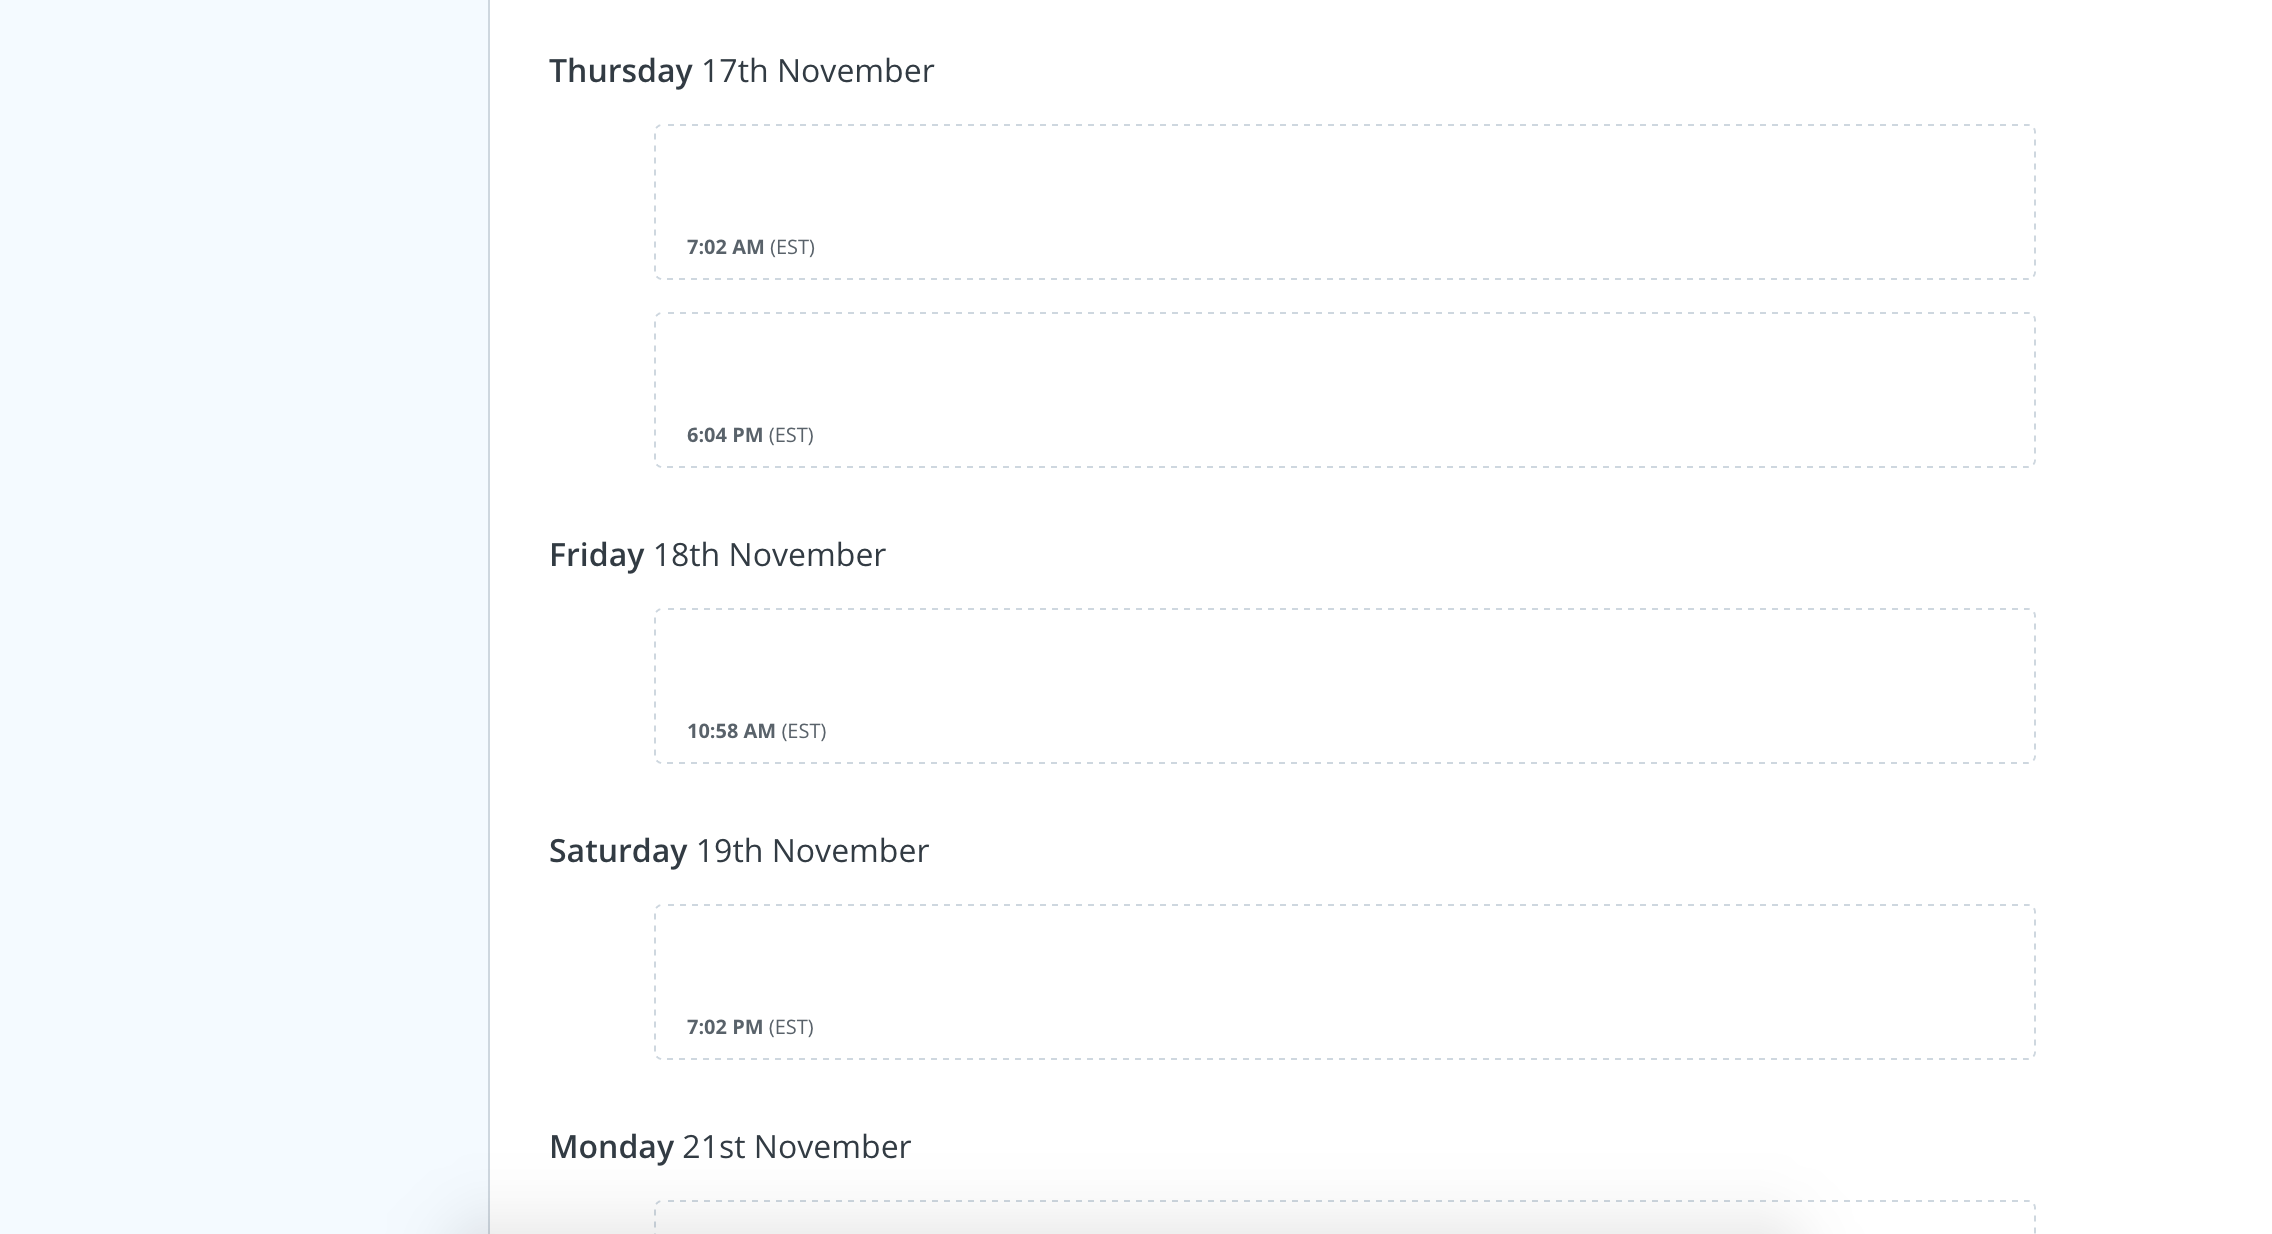
Once you setup your schedule, Buffer will automatically create slots for each day. Then all you have to do is fill the slots with content!
4 | Set aside time in your weekly schedule to fill the spots with content
This is a new thing for me, but I’ve started blocking off time each week to dedicate specifically for social media scheduling. It can be overwhelming to think of how much content you need to share. However, if I dedicate a few hours per week to scheduling social media, it’s much more manageable.
Plus, it feels amazing when you already have posts planned for a whole week or two in advance.
This is also really helpful with the holidays coming up. You can remain active on social platforms without being glued to your phone the entire time.
A Few of my Favorite Features
As I mentioned before, I toggled between a few different scheduling assistants before landing on Buffer, but I’ve been really happy with it. I have the Awesome plan which costs $102/year, however Buffer does offer a free plan as well. I thought it may be helpful to share a few of my favorite features about Buffer.
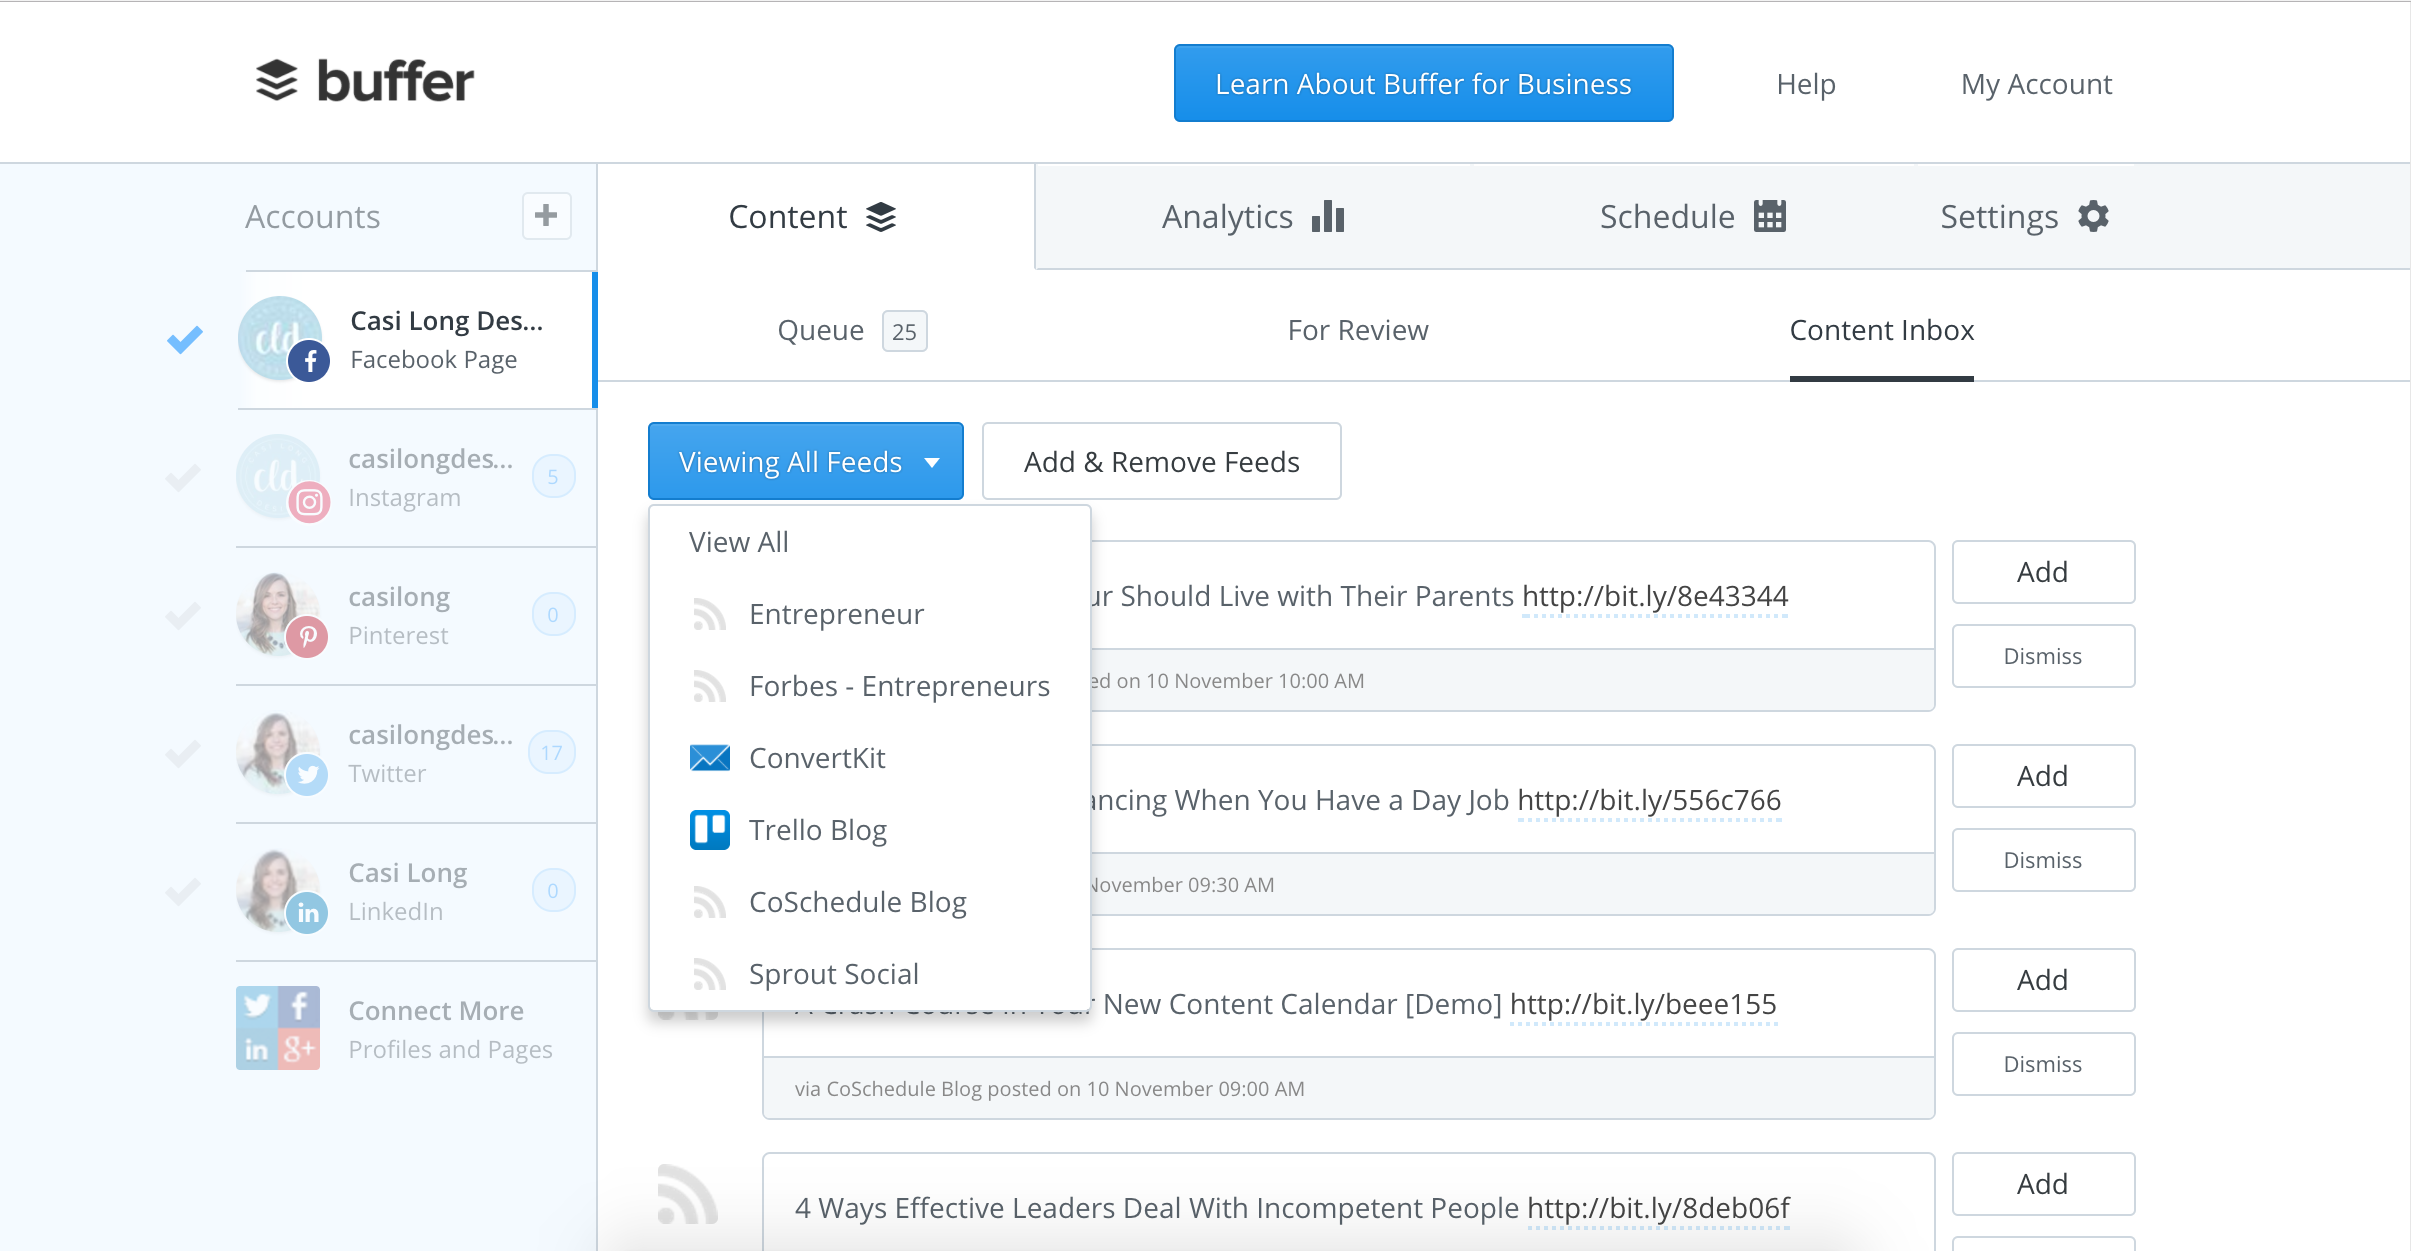
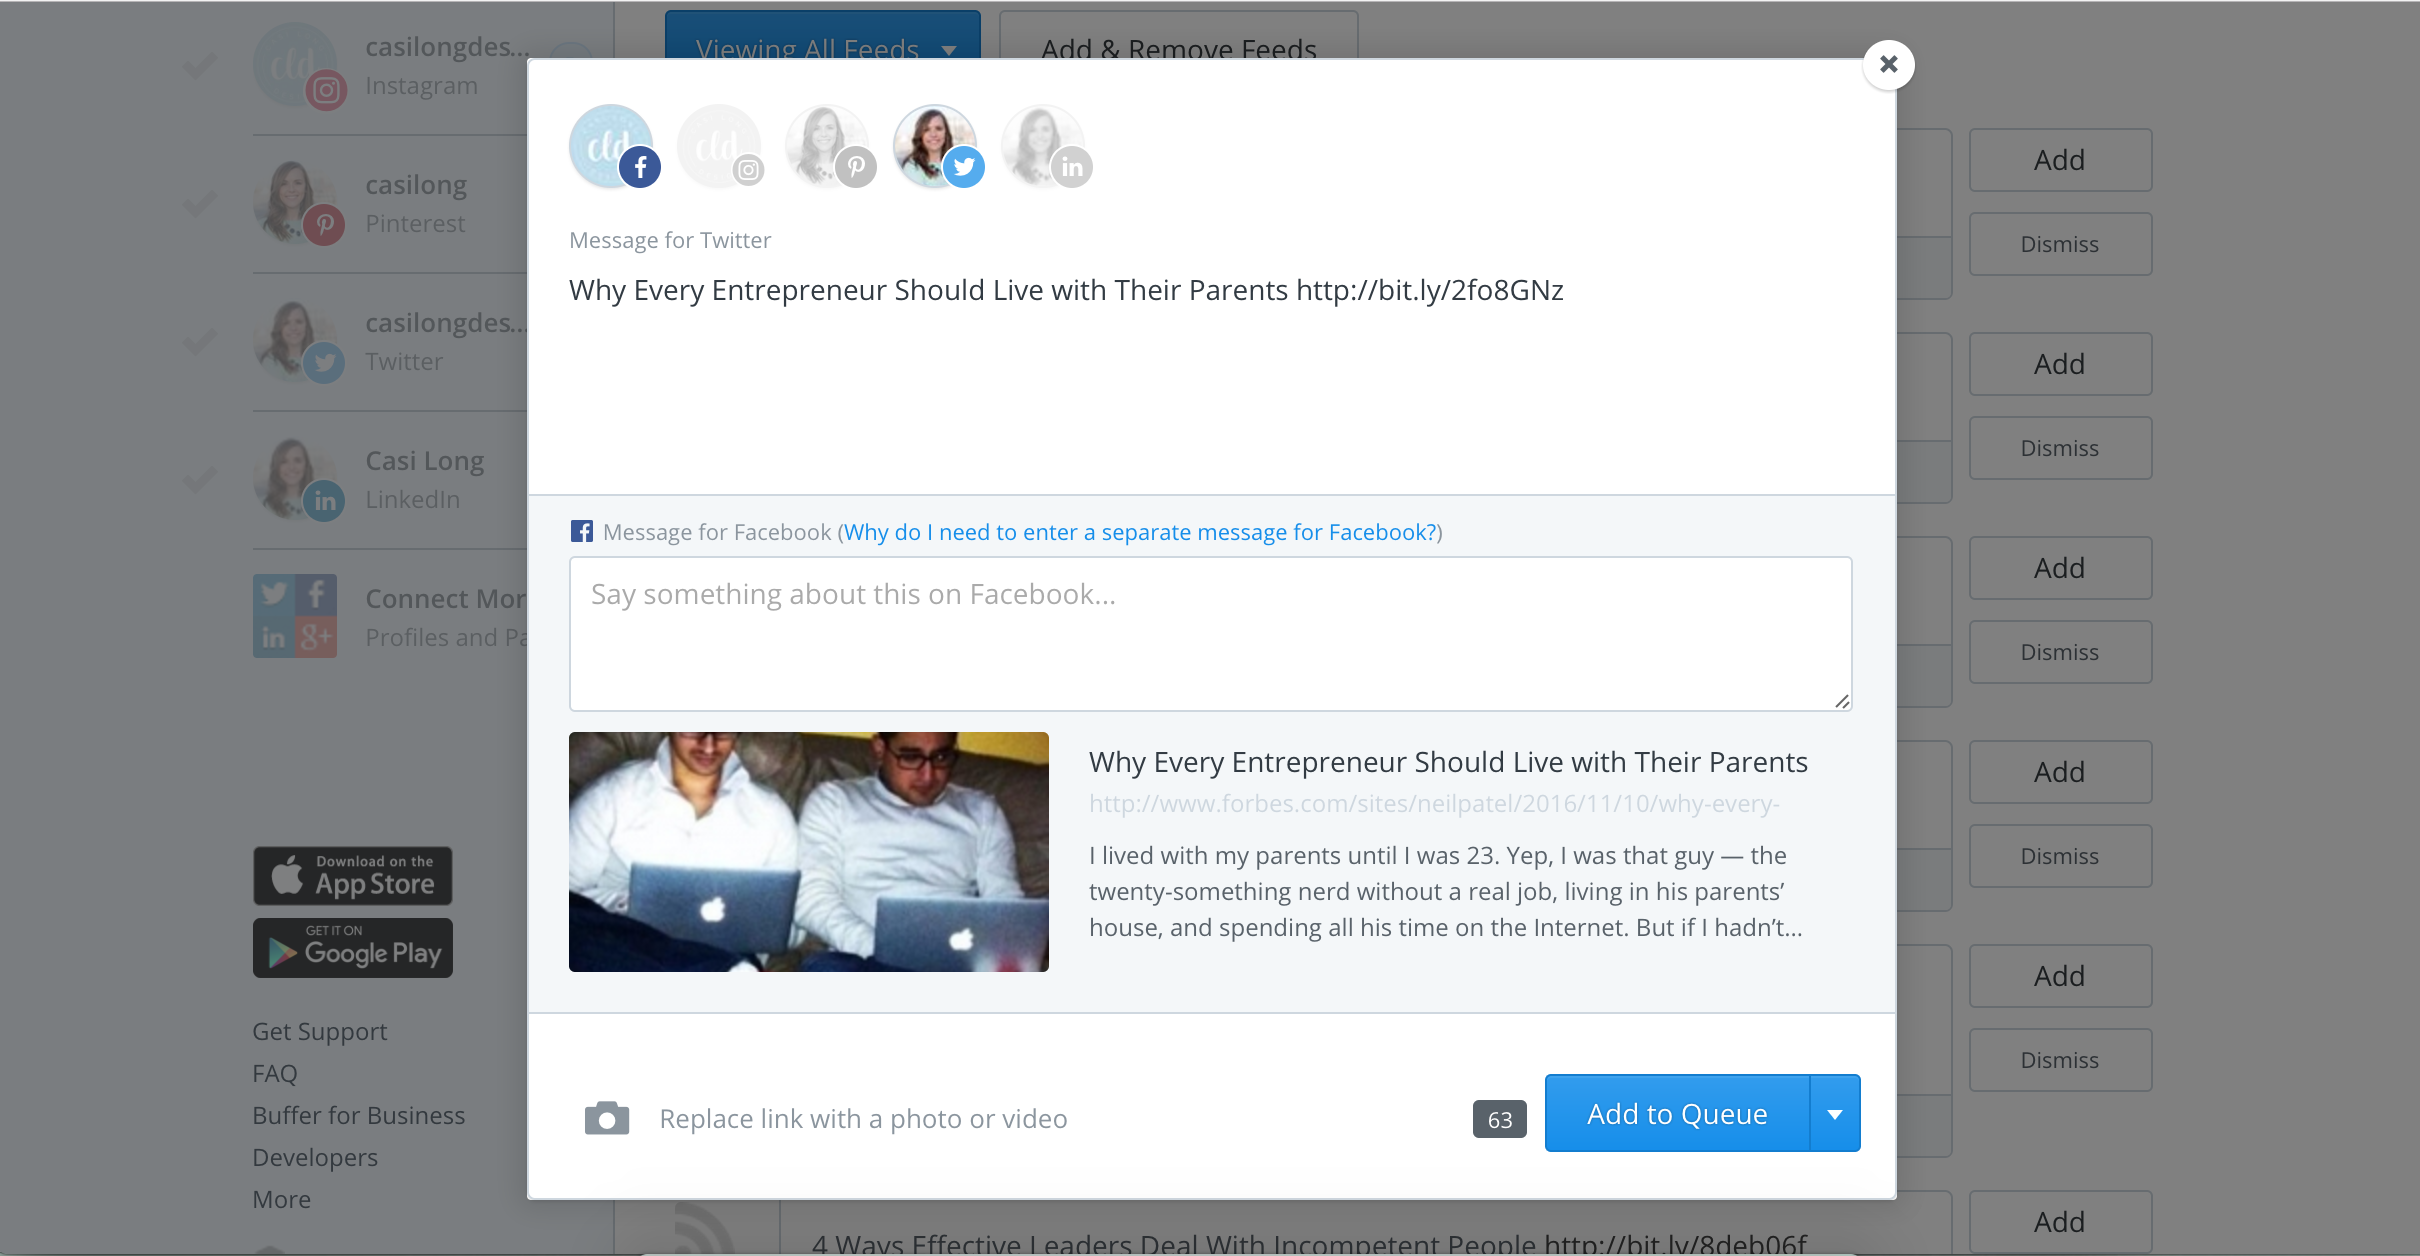
1 | Content inbox feature
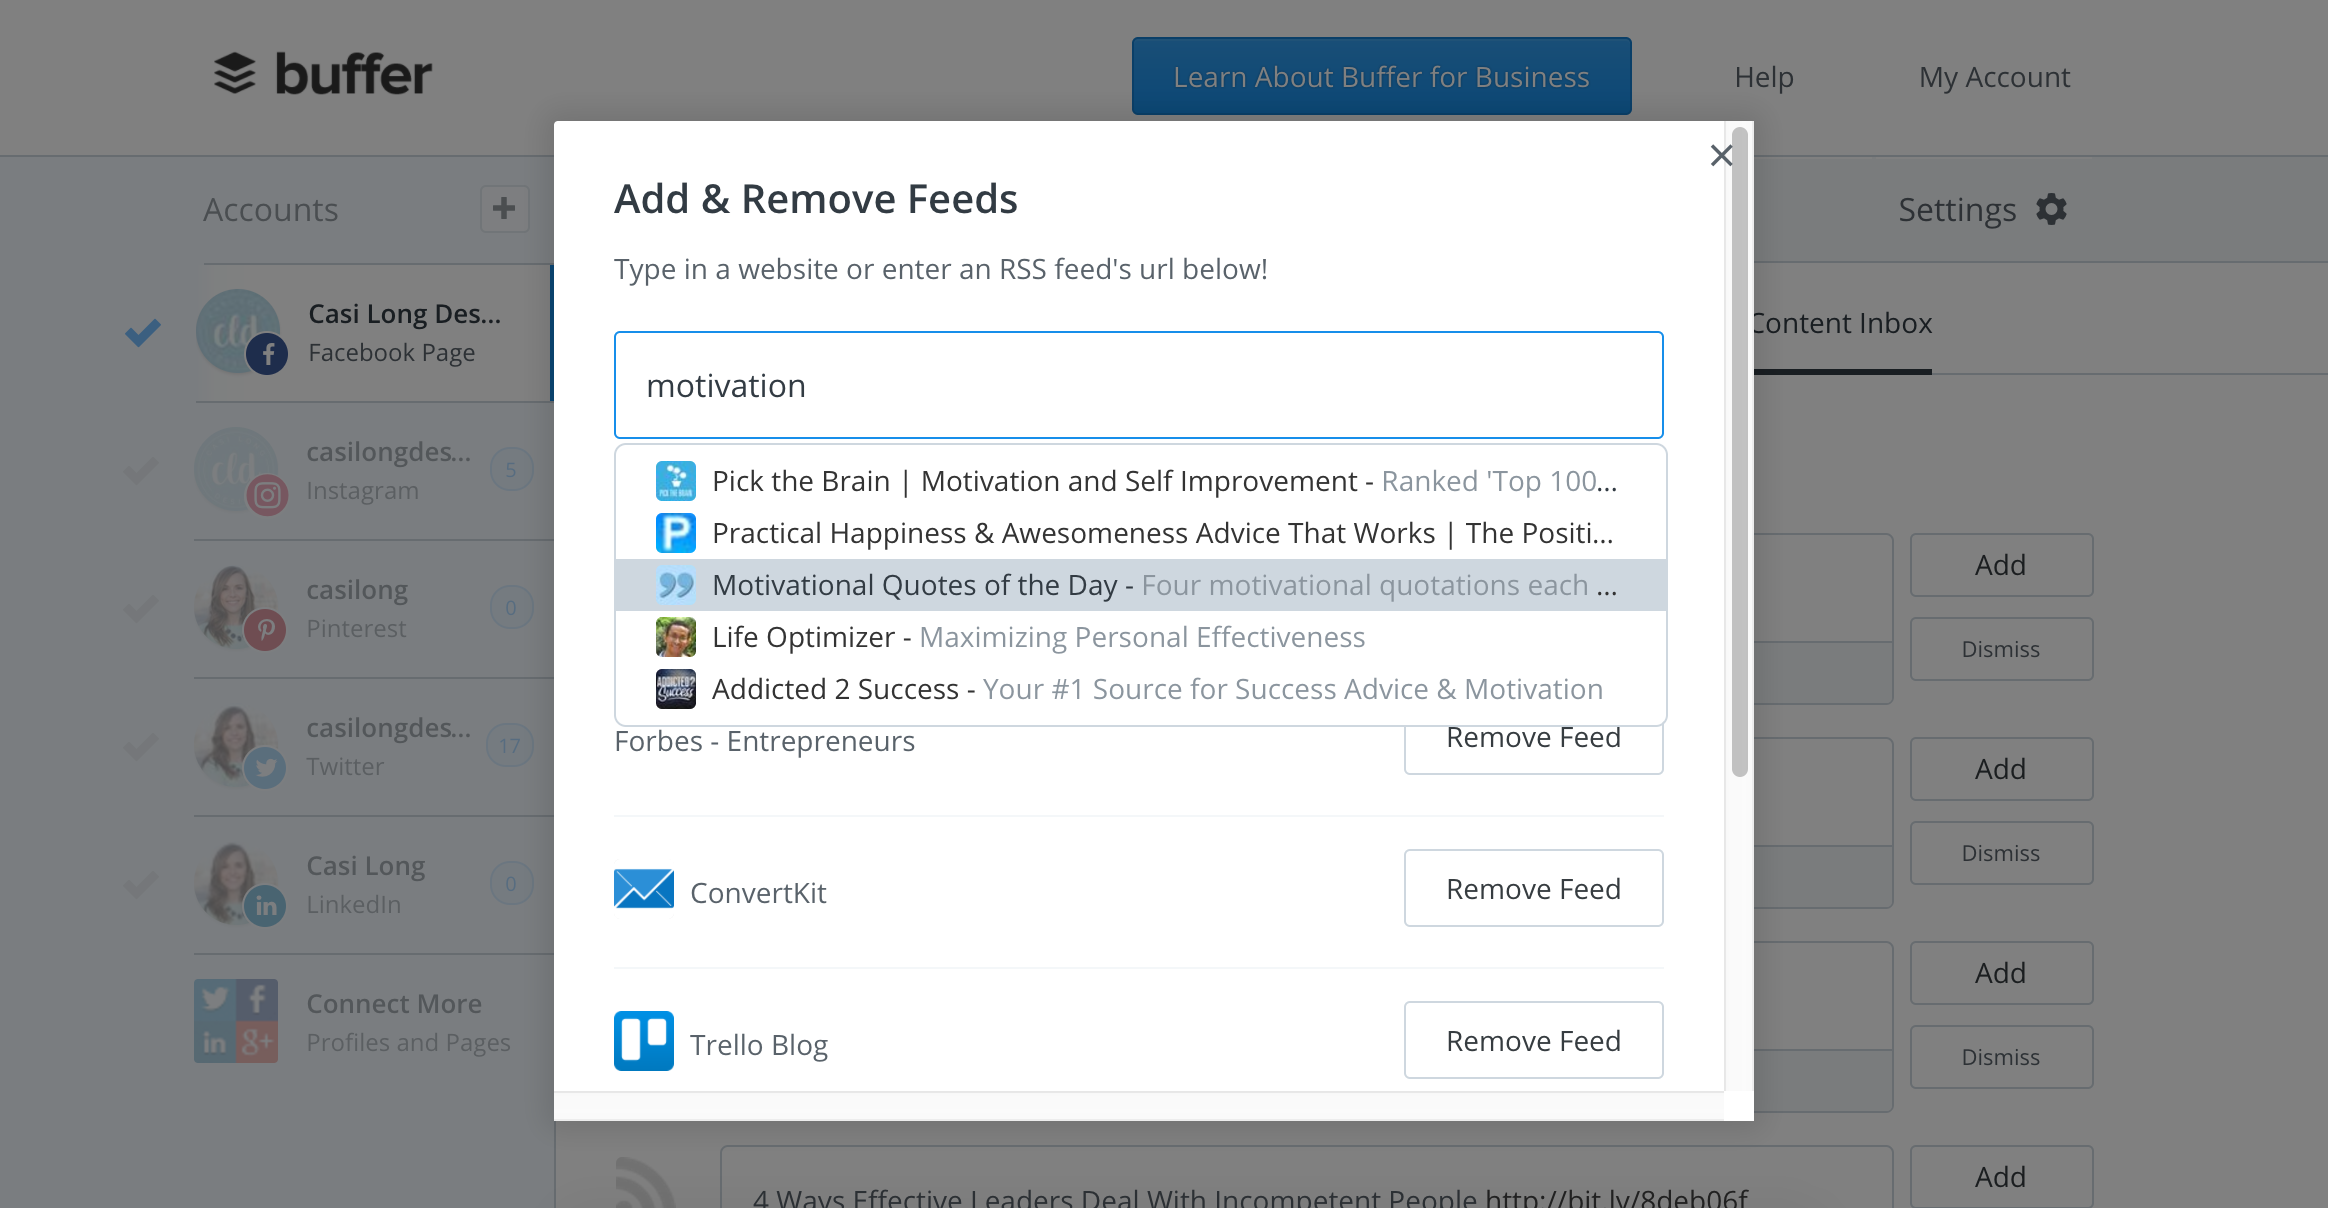
This is a new feature to Buffer and it is absolutely fabulous! How it works is you add websites/sources to your inbox that you often pull content from. Once you do this, the content inbox is populated with all the new articles from those websites.
For example, I reference sites like CoSchedule, Sprout Social, Trello, and Entrepreneur. I added each of these websites to my inbox and now my feed consists of articles from these sites.
Why is this helpful?
It makes it super easy to scroll through your inbox, click and read articles, and simply click “Add” or “Dismiss” to the articles you want to share or get rid of. When you click add you are prompted to share the article across any/all the platforms you have set up.

It has saved me so much time not having to search the web for quality content. Instead, it’s all in one central location.
Click here for a demo and further instructions on using the content inbox.
2 | Plugin for Chrome
This tool is also a huge timesaver. Similar to the Pin It plugin, Buffer also offers a plugin button. It remains in the upper right-hand corner of your browser so whenever you run across a good article you can click the buffer plug in and instantly schedule the content into your social schedule.
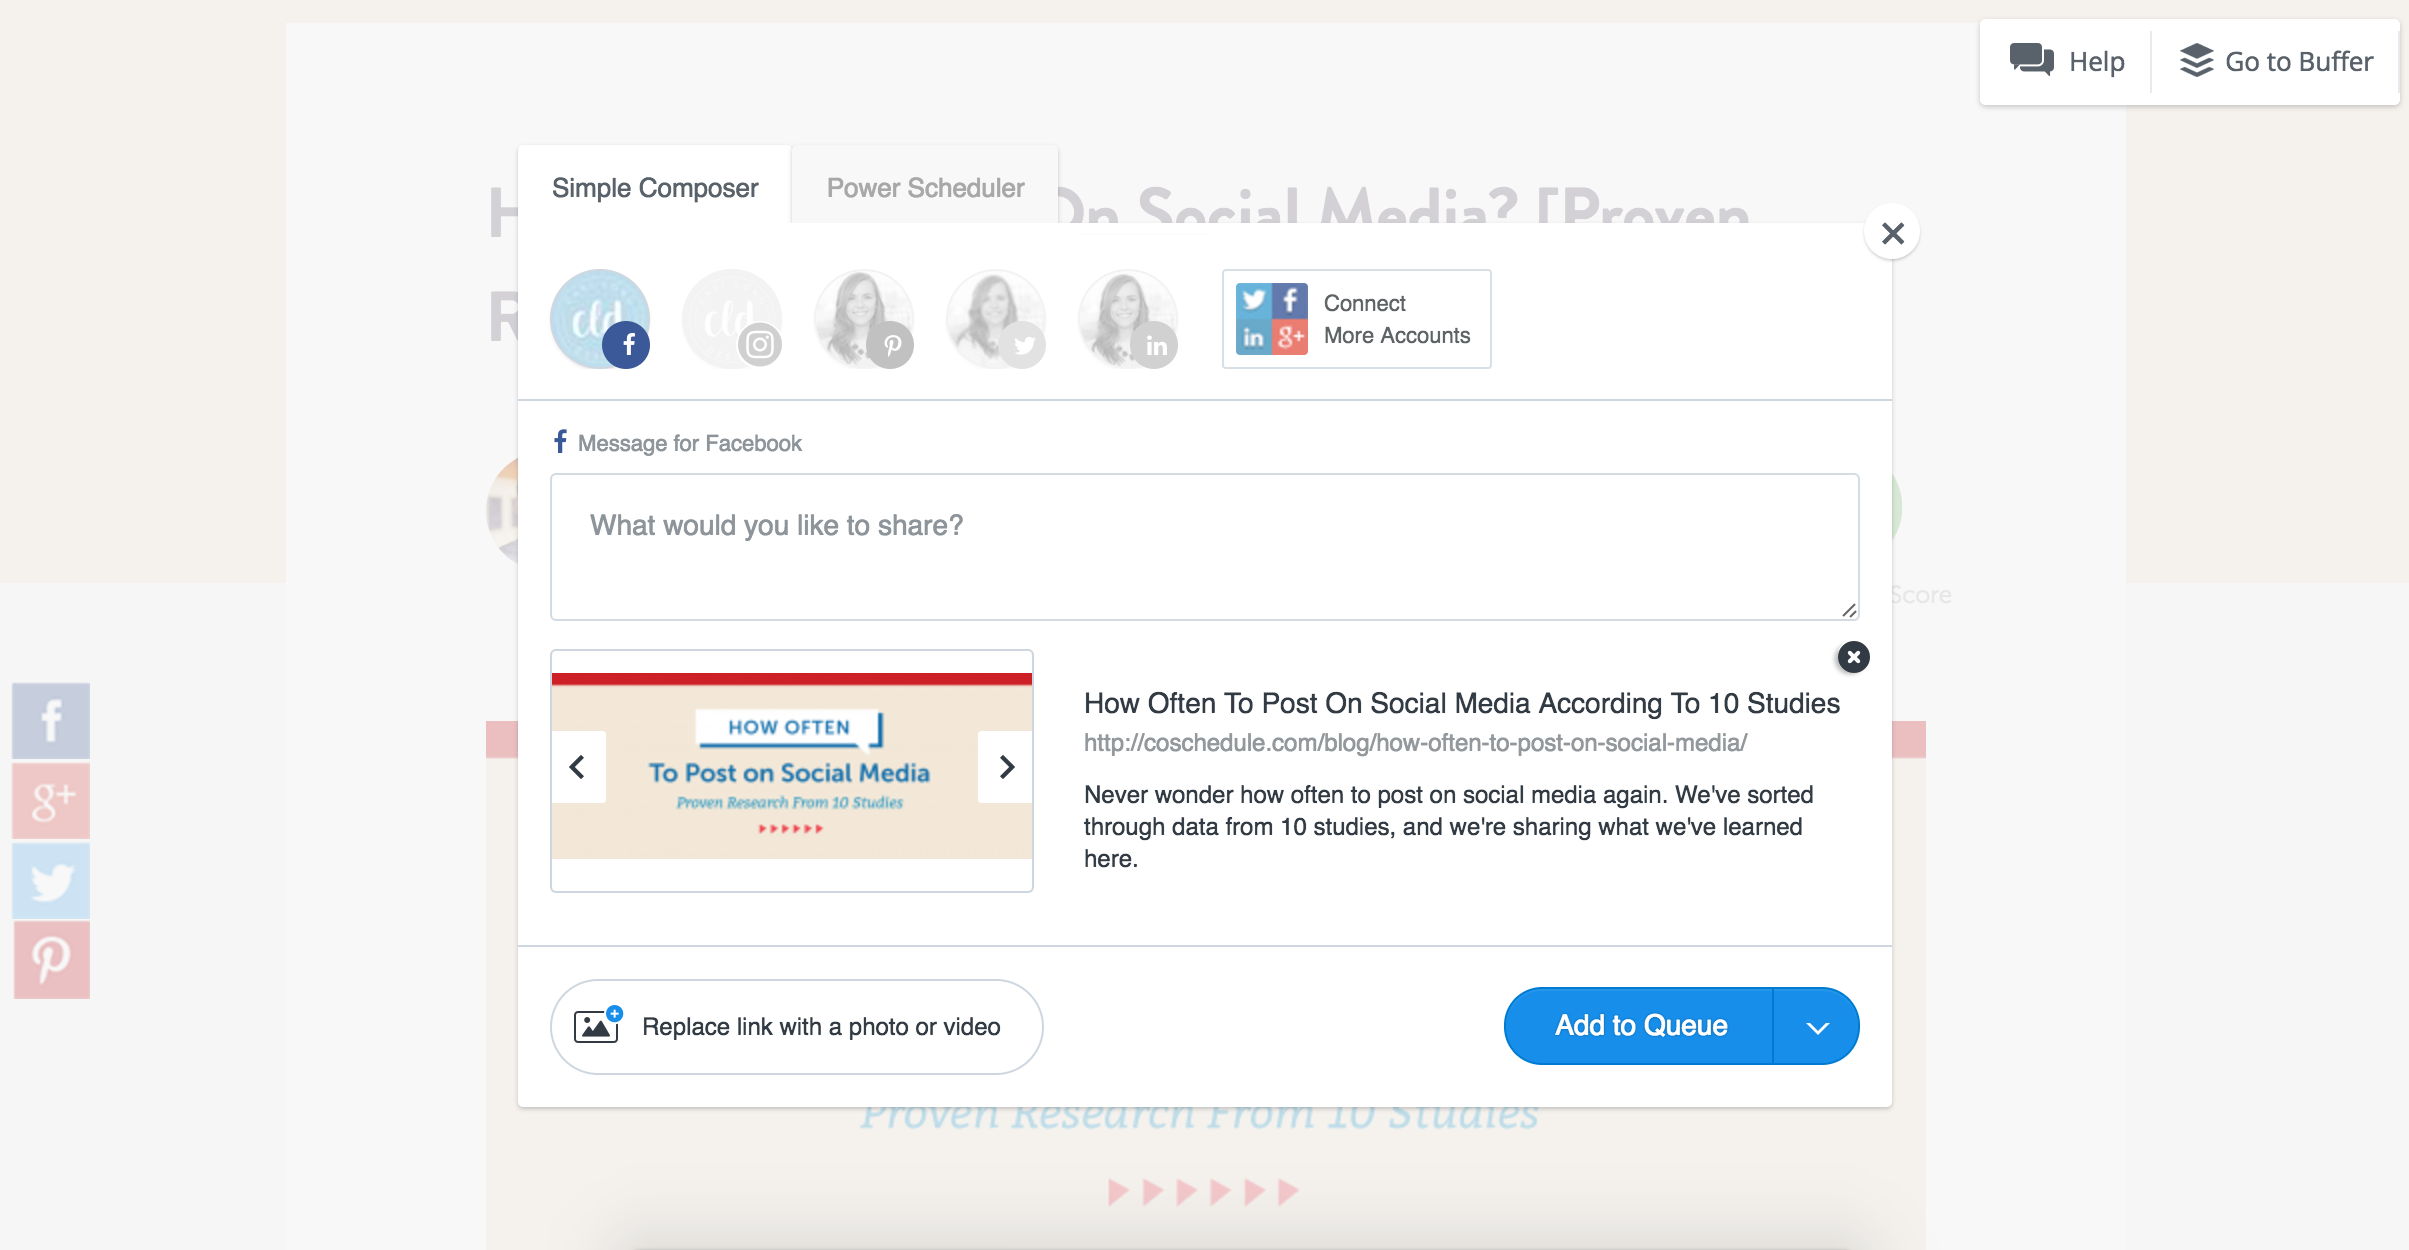
The plugin also places a “Share Image” button over images. Similar to the Pin It image button (in the top left corner of images) the Buffer button is in the bottom right corner of the image. Simply click and set it up to be shared across all your platforms.

3 | Buffer App for posting to Instagram
You are probably aware that Instagram doesn’t allow scheduling and automatic posting. However, you can use the Buffer app (in conjunction with the website) to schedule posts for Instagram.
At the time you have scheduled the post to go live, the buffer app will prompt you to make your post live. You simply click, click, click post. It makes posting to Instagram a breeze and still allows you (for the most part) to plan ahead and schedule your posts.


4 | Calendar view (not available in the free version)
I just started utilizing this feature, but being obsessed with all things calendar-related, I love it. The calendar view allows you to view your scheduled posts in a weekly or monthly calendar view. It’s a simple way to see what all you have planned for the week or month ahead.
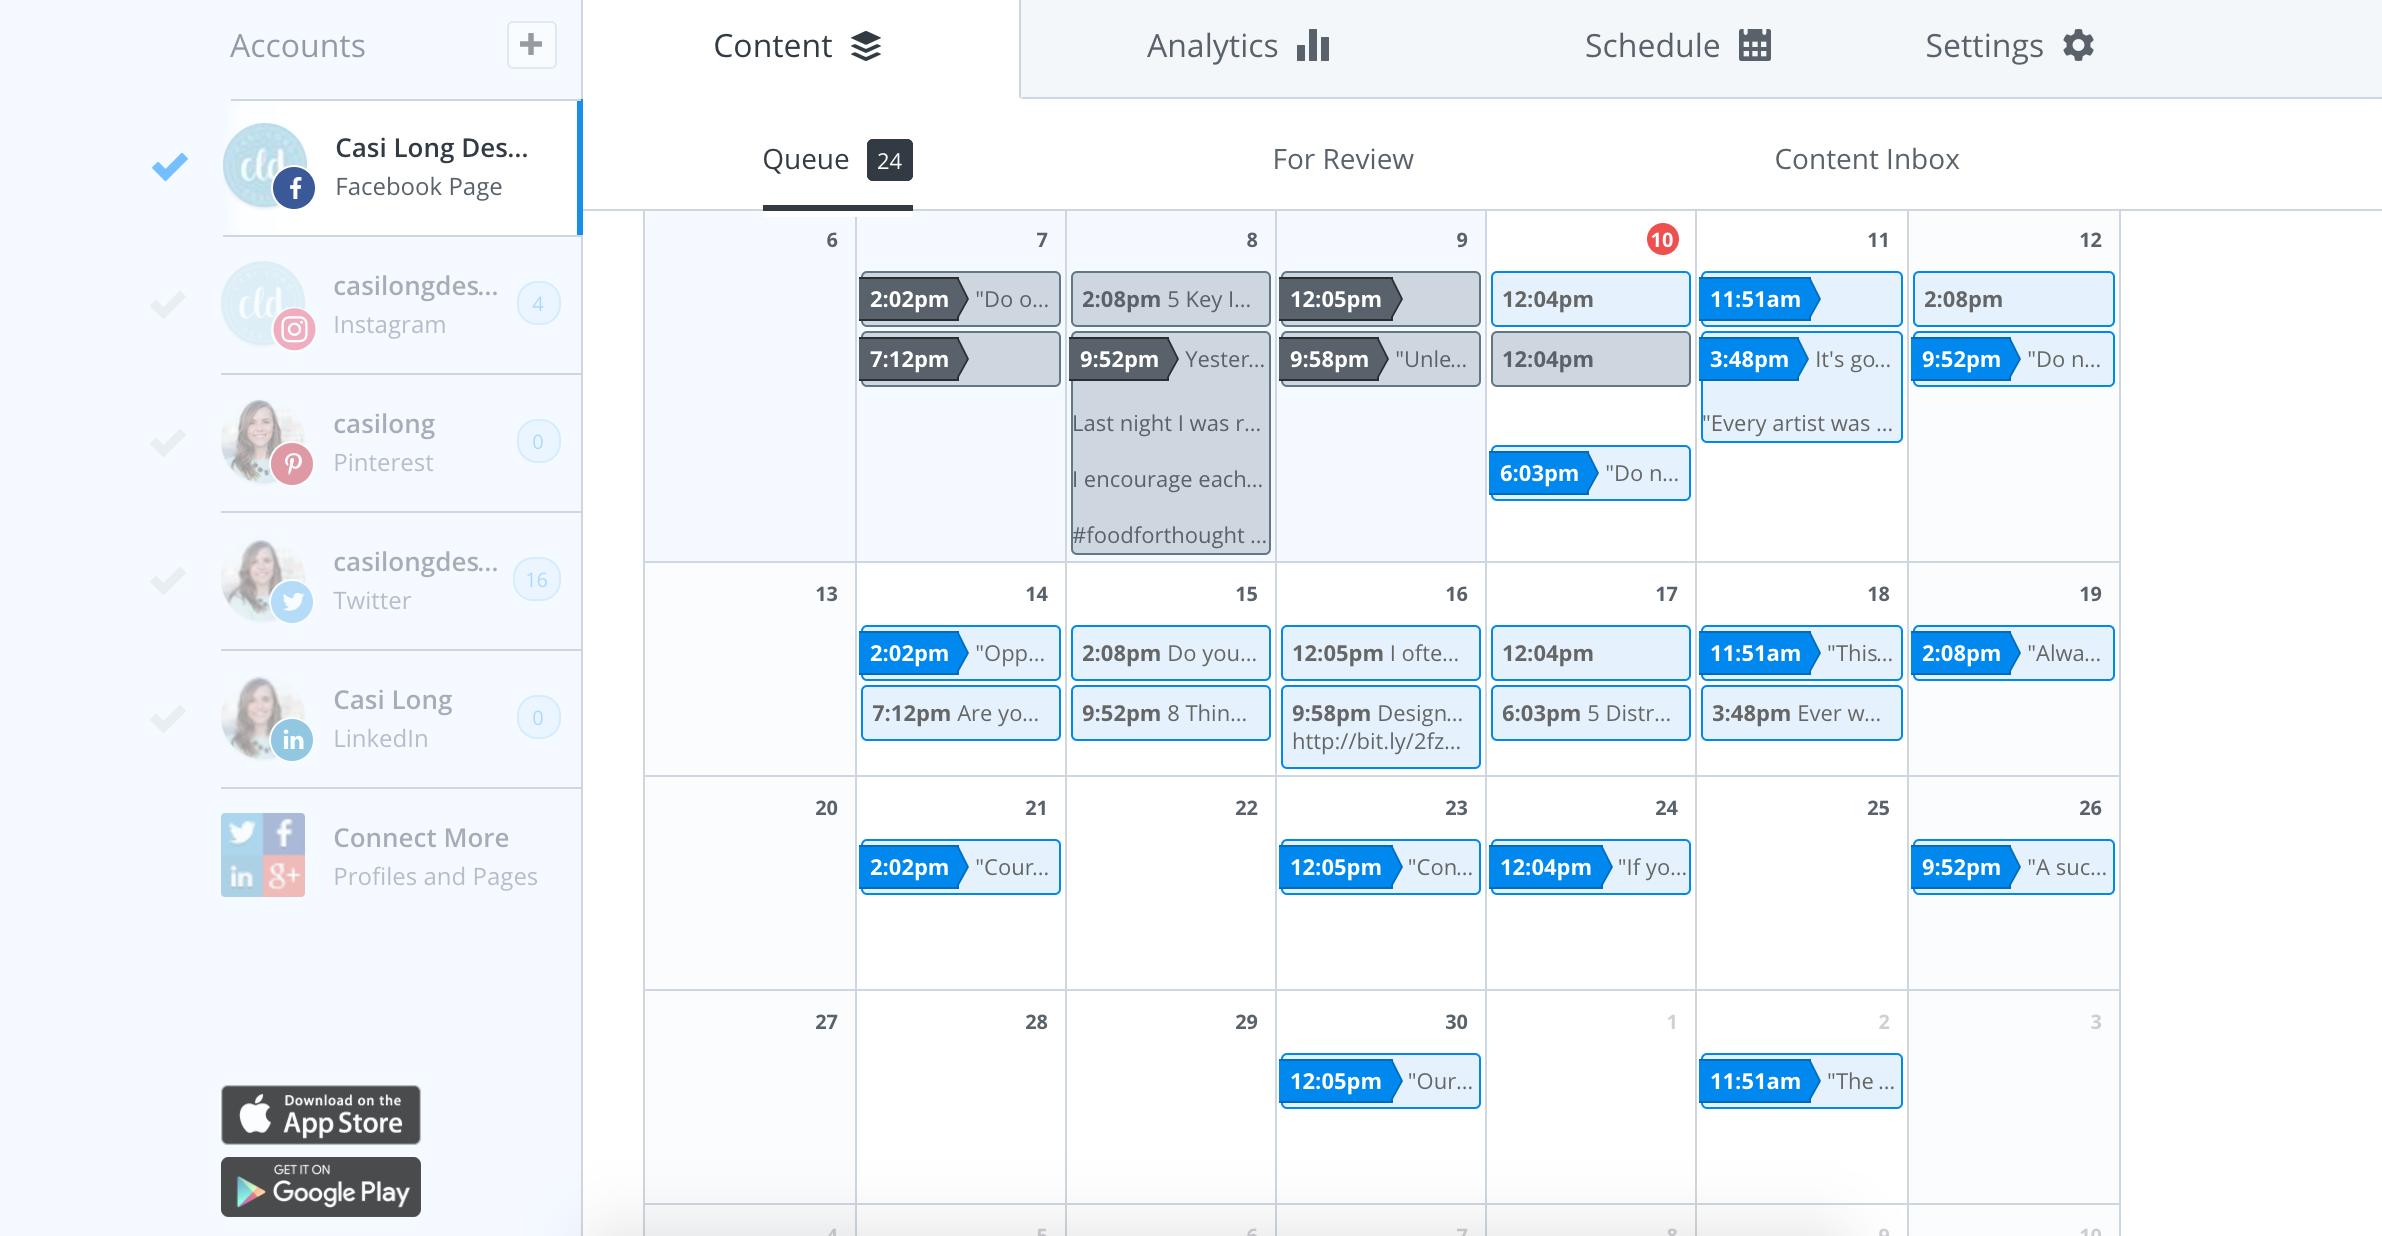
Unfortunately, it’s only available in the paid plans, sad day.
I hope this gave you guys a better idea of all that Buffer has to offer and why it’s beneficial to schedule your social media posts ahead of time. If you have any questions regarding my system or how to use Buffer for your business, go ahead and drop your questions in the comments section below!